OpenAPI 仕様の生成
Strapi はコマンドラインから OpenAPI 仕様を生成するツールを提供します。
CLI は、Strapi アプリの Content API にあるエンドポイント、パラメータ、レスポンス形式を記述した API ドキュメントを自動で作成します。生成した仕様は Swagger UI などのドキュメントツールに取り込む用途などに使えます。
OpenAPI 生成は現在実験段階です。挙動や出力は、セマンティックバージョニングに従わずに将来のリリースで変わる可能性があります。詳しくは Strapi Contributor Docs を参照してください。
OpenAPI 仕様を生成する
OpenAPI 生成ツールは Strapi コアに含まれており、追加インストールは不要です。任意の Strapi プロジェクトでコマンドラインから実行し、API ドキュメントを生成できます。
CLI の使い方
引数なしで実行すると、Strapi プロジェクトのルートに specification.json が出力されます。
- Yarn
- NPM
yarn strapi openapi generate
npm run strapi openapi generate
任意の --output で出力パスとファイル名を指定できます。
- Yarn
- NPM
yarn strapi openapi generate --output ./docs/api-spec.json
npm run strapi openapi generate -- --output ./docs/api-spec.json
仕様の構造と内容
生成される OpenAPI 仕様は OpenAPI 3.1.0 に沿います。短くした例は次のとおりです。
生成された OpenAPI 仕様には、Strapi アプリで利用可能な API エンドポイントと、次のような各エンドポイントに関する情報が含まれます。
- すべてのコンテンツタイプに対する CRUD 操作
- アプリで定義したカスタム API ルート
- ユーザー管理向けの認証エンドポイント
- メディア用のファイルアップロードエンドポイント
- インストール済みプラグインのエンドポイント
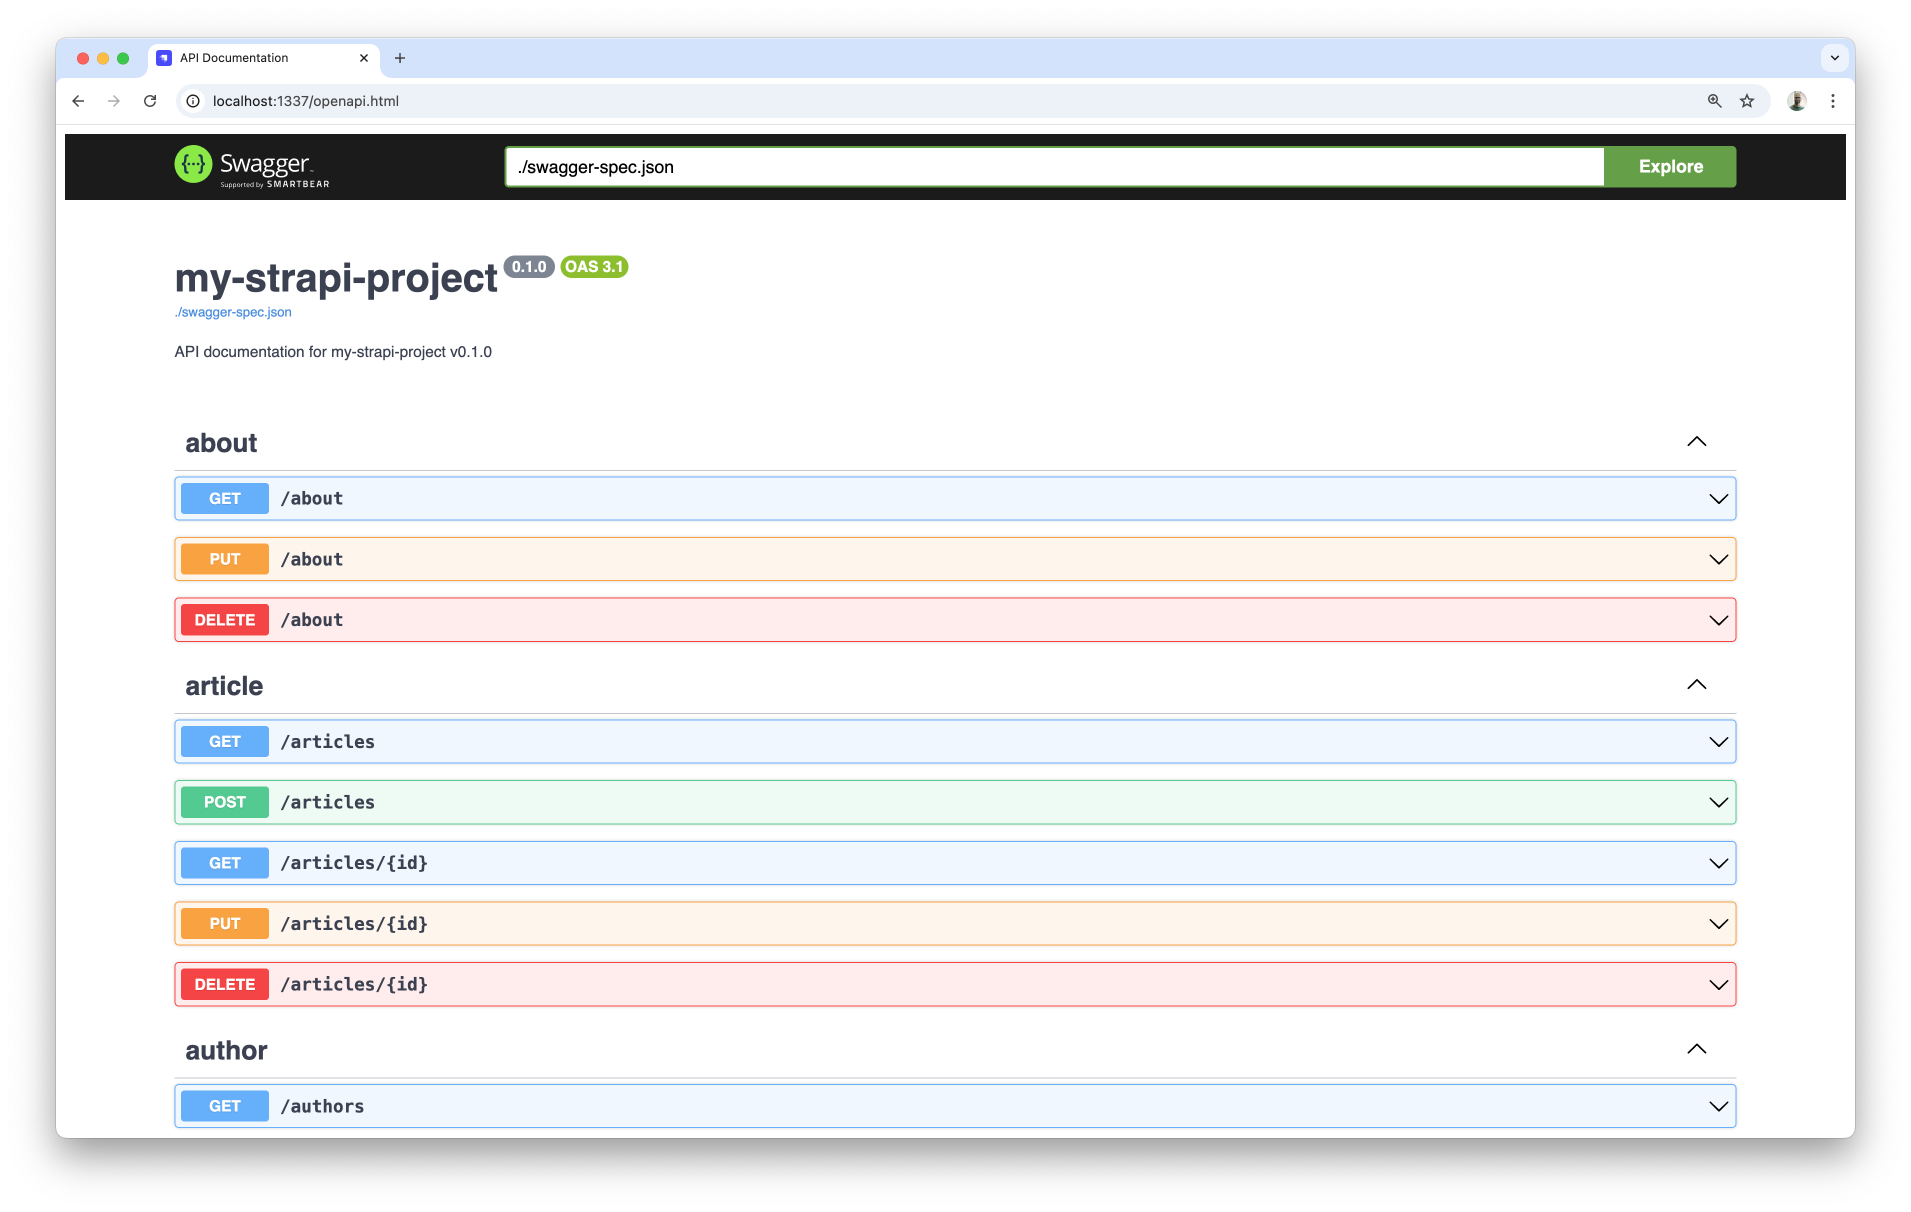
Swagger UI との連携
次の手順で Swagger UI 互換のページをすばやく用意できます。
-
仕様を生成します。
- Yarn
- NPM
yarn strapi openapi generate --output ./public/swagger-spec.jsonnpm run strapi openapi generate -- --output ./public/swagger-spec.json -
/config/middlewares.jsの設定 を次のコードに更新します。- JavaScript
- TypeScript
/config/middlewares.jsmodule.exports = [
'strapi::logger',
'strapi::errors',
{
name: 'strapi::security',
config: {
contentSecurityPolicy: {
useDefaults: true,
directives: {
'script-src': ["'self'", "'unsafe-inline'", 'https://unpkg.com'],
'style-src': ["'self'", "'unsafe-inline'", 'https://unpkg.com'],
'connect-src': ["'self'", 'https:'],
'img-src': ["'self'", 'data:', 'blob:', 'https:'],
'media-src': ["'self'", 'data:', 'blob:'],
upgradeInsecureRequests: null,
},
},
},
},
'strapi::cors',
'strapi::poweredBy',
'strapi::query',
'strapi::body',
'strapi::session',
'strapi::favicon',
'strapi::public',
];/config/middlewares.tsexport default [
'strapi::logger',
'strapi::errors',
{
name: 'strapi::security',
config: {
contentSecurityPolicy: {
useDefaults: true,
directives: {
'script-src': ["'self'", "'unsafe-inline'", 'https://unpkg.com'],
'style-src': ["'self'", "'unsafe-inline'", 'https://unpkg.com'],
'connect-src': ["'self'", 'https:'],
'img-src': ["'self'", 'data:', 'blob:', 'https:'],
'media-src': ["'self'", 'data:', 'blob:'],
upgradeInsecureRequests: null,
},
},
},
},
'strapi::cors',
'strapi::poweredBy',
'strapi::query',
'strapi::body',
'strapi::session',
'strapi::favicon',
'strapi::public',
];こうすると unpkg.com から読み込む Swagger UI が、セキュリティミドルウェア の CSP でブロックされにくくなります。
-
Strapi プロジェクトに
public/openapi.htmlを作成し、Swagger UI を表示する次のコードを入れます。<!DOCTYPE html>
<html>
<head>
<title>API Documentation</title>
<link
rel="stylesheet"
type="text/css"
href="https://unpkg.com/swagger-ui-dist@5.0.0/swagger-ui.css"
/>
</head>
<body>
<div id="swagger-ui"></div>
<script src="https://unpkg.com/swagger-ui-dist@5.0.0/swagger-ui-bundle.js"></script>
<script src="https://unpkg.com/swagger-ui-dist@5.0.0/swagger-ui-standalone-preset.js"></script>
<script>
window.onload = function () {
SwaggerUIBundle({
url: './swagger-spec.json',
dom_id: '#swagger-ui',
presets: [
SwaggerUIBundle.presets.apis,
SwaggerUIStandalonePreset
],
layout: 'StandaloneLayout',
});
};
</script>
</body>
</html> -
Strapi サーバーを
yarn developまたはnpm run developで再起動し、/openapi.htmlを開きます。Swagger UI が表示されます。